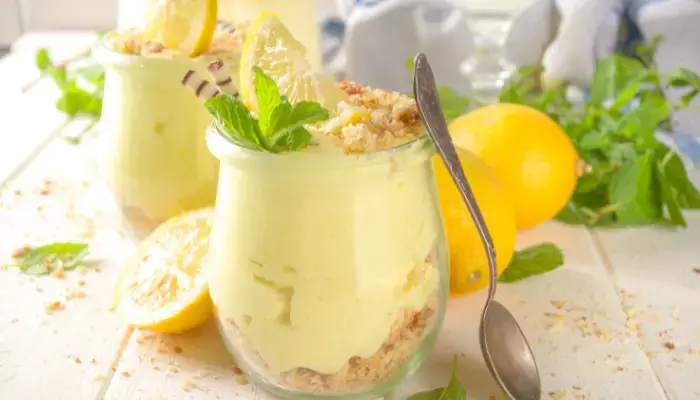
There’s something about lemon desserts that feels like sunshine in a spoon. These No-Bake Lemon Cheesecake Jars are creamy, tangy, sweet, and ridiculously easy to make. No oven. No water bath. No stress. Just layers of buttery crumbs and silky lemon cheesecake filling tucked into cute little jars.
I started making these during one especially hot week when turning on the oven felt like a personal attack. After testing plenty of shortcut desserts over the last five years, I’ve learned that simple recipes can still taste bakery-level good. And honestly? These cheesecake jars are proof. They look fancy enough for guests but are easy enough for a random Tuesday night craving.
The best part is how forgiving this recipe is. Even if you’re new to making cheesecake, these No-Bake Lemon Cheesecake Jars come together without much fuss. If you can mix and chill, you can make this dessert.
Why You’ll Love This Recipe
These No-Bake Lemon Cheesecake Jars are the kind of dessert people quietly scrape clean when they think nobody is looking. They’re quick to make, full of fresh lemon flavor, and perfect for warm weather when nobody wants to bake. The individual jars make serving easy for parties, picnics, or family dinners, and they store beautifully in the fridge. Plus, the creamy filling and crunchy crust combo never disappoints. Never. Not even once.
Ingredients You’ll Need
For the Crust
1 ½ cups graham cracker crumbs
5 tablespoons unsalted butter, melted
2 tablespoons granulated sugar
For the Lemon Cheesecake Filling
16 oz cream cheese, softened
1 cup heavy whipping cream
¾ cup powdered sugar
2 tablespoons fresh lemon juice
1 tablespoon lemon zest
1 teaspoon vanilla extract
Optional Toppings
Whipped cream
Extra lemon zest
Fresh berries
Crushed graham crackers
Graham cracker crumbs, butter, sugar, cream cheese, heavy cream, powdered sugar, fresh lemon juice, lemon zest, vanilla extract, whipped cream, berries.
Equipment Needed
- Mixing bowls
- Hand mixer or stand mixer
- Measuring cups and spoons
- Rubber spatula
- Small jars or dessert cups
- Spoon
How Do You Make No-Bake Lemon Cheesecake Jars?
Step 1: Make the crust
In a medium bowl, mix the graham cracker crumbs, melted butter, and sugar until the mixture resembles wet sand. If you squeeze some in your hand, it should hold together.
Spoon a few tablespoons into the bottom of each jar and gently press it down with the back of a spoon.
Step 2: Beat the cream cheese
In a large bowl, beat the softened cream cheese until completely smooth. This step matters more than people think. Lumpy cheesecake filling is not the vibe today.
Add the powdered sugar, lemon juice, lemon zest, and vanilla extract. Mix until creamy and combined.
Step 3: Whip the cream
In a separate bowl, whip the heavy cream until stiff peaks form. That means the cream holds its shape when you lift the beaters.
Step 4: Fold everything together
Gently fold the whipped cream into the lemon cream cheese mixture. Take your time here so the filling stays light and fluffy.
Step 5: Fill the jars
Spoon or pipe the cheesecake filling into the jars over the crust layer. Smooth the tops with a spoon.
Step 6: Chill
Cover the jars and refrigerate for at least 3 hours. Overnight is even better because the flavors settle and the texture firms up beautifully.
Step 7: Add toppings and serve
Right before serving, add whipped cream, lemon zest, berries, or extra graham cracker crumbs if you like.
Then grab a spoon and prepare for silence at the table.
Common Mistakes to Avoid
Using cold cream cheese
Cold cream cheese creates lumps that are hard to fix later. Let it soften fully before mixing.
Overmixing the whipped cream
Whipped cream can quickly turn grainy if beaten too long. Stop once stiff peaks form.
Skipping the chill time
The jars need time to firm up properly. Warm cheesecake filling tastes good, but chilled filling tastes amazing.
Adding too much lemon juice
Extra lemon juice sounds tempting, but too much can thin the filling and affect the texture.
Packing the crust too tightly
Press it gently. A rock-solid crust makes the dessert harder to eat straight from the jar.
Pro Tips
Fresh lemon zest makes a huge difference here, so don’t skip it if possible. I’ve tested bottled lemon juice before, and while it works in emergencies, fresh lemon gives the cheesecake a brighter flavor that tastes way more homemade. If you want extra texture, add a thin middle layer of crushed cookies between the cheesecake filling. For parties, pipe the filling into jars using a zip-top bag with the corner cut off. It looks cleaner and takes less time. And if you want a richer flavor, swap vanilla extract for a tiny splash of lemon extract, along with the fresh juice.
Serving Suggestions
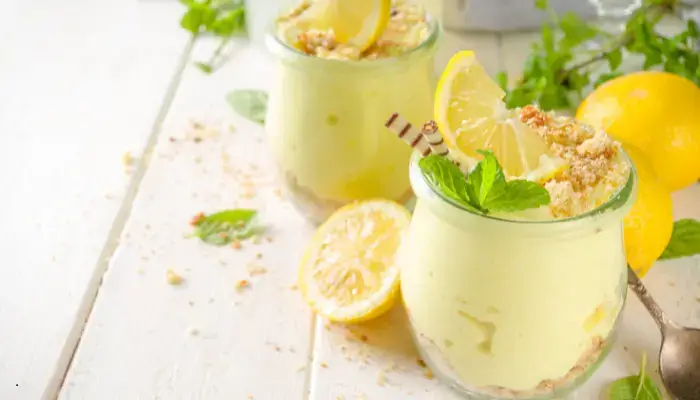
These No-Bake Lemon Cheesecake Jars are perfect after grilled dinners, summer BBQs, or heavier meals because the lemon keeps everything tasting light and fresh. I also love serving them with iced coffee, sweet tea, or fresh fruit on the side. For special occasions, top them with raspberries or blueberries for a simple but beautiful dessert spread.
Storage & Reheating Instructions
Store the cheesecake jars in the refrigerator, covered, for up to 4 days. They actually taste even better after the first day, once the flavors have settled. You can also freeze them for up to 1 month, though the texture may soften slightly after thawing. Since this is a no-bake dessert, reheating is definitely not recommended unless cheesecake soup is your thing.
No Bake Lemon Cheesecake Jars
Creamy, refreshing lemon cheesecake, layered with a buttery graham cracker crust, in individual jars. This easy no-bake dessert is perfect for warm weather and make-ahead entertaining.
Ingredients
- 1 ½ cups graham cracker crumbs
- 5 tablespoons unsalted butter, melted
- 2 tablespoons granulated sugar
- 16 oz cream cheese, softened
- 1 cup heavy whipping cream
- ¾ cup powdered sugar
- 2 tablespoons fresh lemon juice
- 1 tablespoon lemon zest
- 1 teaspoon vanilla extract
- Whipped cream for topping (optional)
- Fresh berries for topping (optional)
Instructions
- Mix graham cracker crumbs, melted butter, and sugar in a bowl until combined.
- Spoon the crust mixture into jars and gently press down.
- Beat softened cream cheese until smooth.
- Add powdered sugar, lemon juice, lemon zest, and vanilla extract. Mix until creamy.
- In a separate bowl, whip heavy cream until stiff peaks form.
- Gently fold whipped cream into the cream cheese mixture.
- Spoon or pipe filling into jars over the crust layer.
- Cover and refrigerate for at least 3 hours or overnight.
- Add toppings before serving if desired.
Notes
Use fresh lemon juice and zest for the brightest flavor. Chill overnight for the best texture. Store in the refrigerator, covered, for up to 4 days.
Nutrition Information
Yield
6Serving Size
6Amount Per Serving Calories 3930Total Fat 304gSaturated Fat 185gUnsaturated Fat 119gCholesterol 889mgSodium 1628mgCarbohydrates 273gFiber 3gSugar 244gProtein 38g
Note: Nutritional values are automated estimates and may vary. Please use your preferred calculator for exact counts.
Final Thoughts
These No-Bake Lemon Cheesecake Jars are one of those desserts that look impressive without requiring complicated steps. They’re creamy, refreshing, and easy enough for beginners to pull off confidently. If you try them, don’t be surprised when people start asking for the recipe before they even finish dessert.
Frequently Asked Questions
How do I make No-Bake Lemon Cheesecake Jars ahead of time?
These jars are great for making ahead. You can prepare them up to 24 hours before serving and refrigerate them until needed.
Can I freeze lemon cheesecake jars?
Yes, you can freeze them for about 1 month. Thaw overnight in the refrigerator for the best texture before serving.
What is the best jar size for cheesecake jars?
Small 6- to 8-ounce jars work best because they create nice layers and manageable serving sizes without feeling too heavy.
How long does a no-bake cheesecake need to chill?
At least 3 hours is recommended, but overnight chilling gives the best texture and flavor.
Can I use bottled lemon juice instead of fresh?
You can, but fresh lemon juice and zest give the dessert a much brighter and fresher flavor overall.